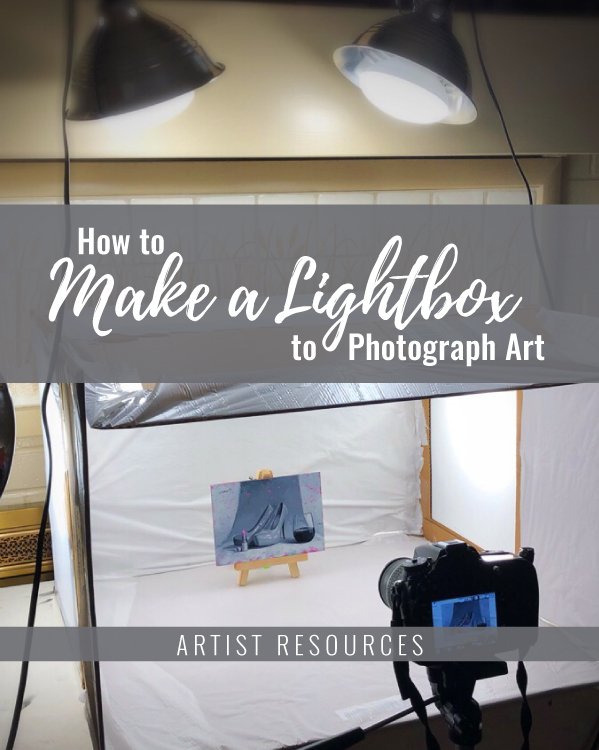
How to Make a Lightbox to Photograph Art
UPDATE DEC. 17 - 2024
If you are constantly waiting for an overcast day to photograph outside, or fighting glare with studio lights, this is your solution.
I am not a professional photographer, but I can find my way around my DSLR well enough.
Having a busy schedule and a tight budget means I photograph my own work, and I like to do it in the easiest and fastest way possible.
My set up is simple and inexpensive but the benefits are huge! It practically eliminates glare from lighting (or the sky if you shoot outside), which makes photographing oil paintings with gloss varnish much easier.
This box works great for both my DSLR camera and my iPhone.
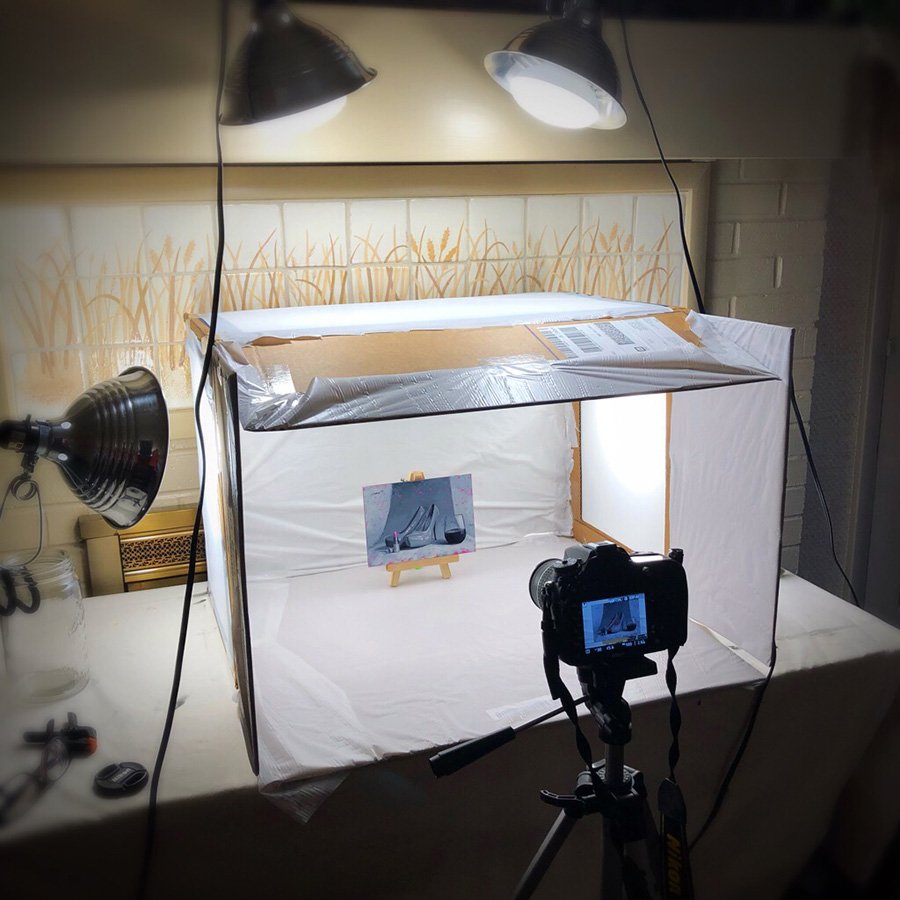
All you need is a large, sturdy cardboard box to make your own photography light box. Look how huge this one is (that is an 5x7 inch painting, and I have plenty of room for much larger).
Supplies needed to build your lightbox
Large, sturdy cardboard box
White paper or other white or light grey, matte (non-shiny) material
Semi-opaque/transulcent paper, tracing paper, white plastic, etc. - Something to diffuse your light source.
Clear or white tape (I used my packing tape)
Sheet of neutral mid-grey paper
How to build your lightbox
Securely tape the bottom of the box so there are no gaps, inside do the same as well so the flaps lay flat
Lay the box on it's side (vertical or horizontal is your choice and depends on what the orientation the majority of your work is)
Cut out 3 sides, leaving about 1-1.5 inches to the edges for stability.
Line the inside with the white/light grey paper (I used matte white plastic sheeting since I had a roll of it) and attach with tape
Cut pieces of your Semi-opaque/transulcent paper and attach from the outside over your openings.
If you are struggling to get an accurate color photo, place the piece of neutral gray paper on the back of the box (interior) which makes it easier to adjust the white balance settings on your camera.

Done!
It doesn't have to be pretty, just effective!
How to Light your Lightbox
For lighting, I use a very flexible and cost effective setup:
4 clamp on reflector lights from the hardware store (about $8 each)
4 BR40 LED bulbs (CRI 94, 4000k or 5000k) I originally ordered bulbs on Amazon in a 4-pack for around $34, however, the listings are always changing. The last bulbs I ordered came in an 8-pack and they’ve lasted years.
I clamp the lights onto anything... easels, coat stands, desks, mason jars (seriously, these work great). The bulbs barely put off any heat, which allows me to put them super close to my box if needed.
A few adjustments to the white balance on my camera and I can capture images of my work accurate enough that with just a few temperature adjustments, and some minor tweaks in Photoshop's Camera Raw Filter, I quickly and accurately have a glare free image of my painting.
This was the original bulbs I ordered. But any CRI94 4000k LED bulbs will work.
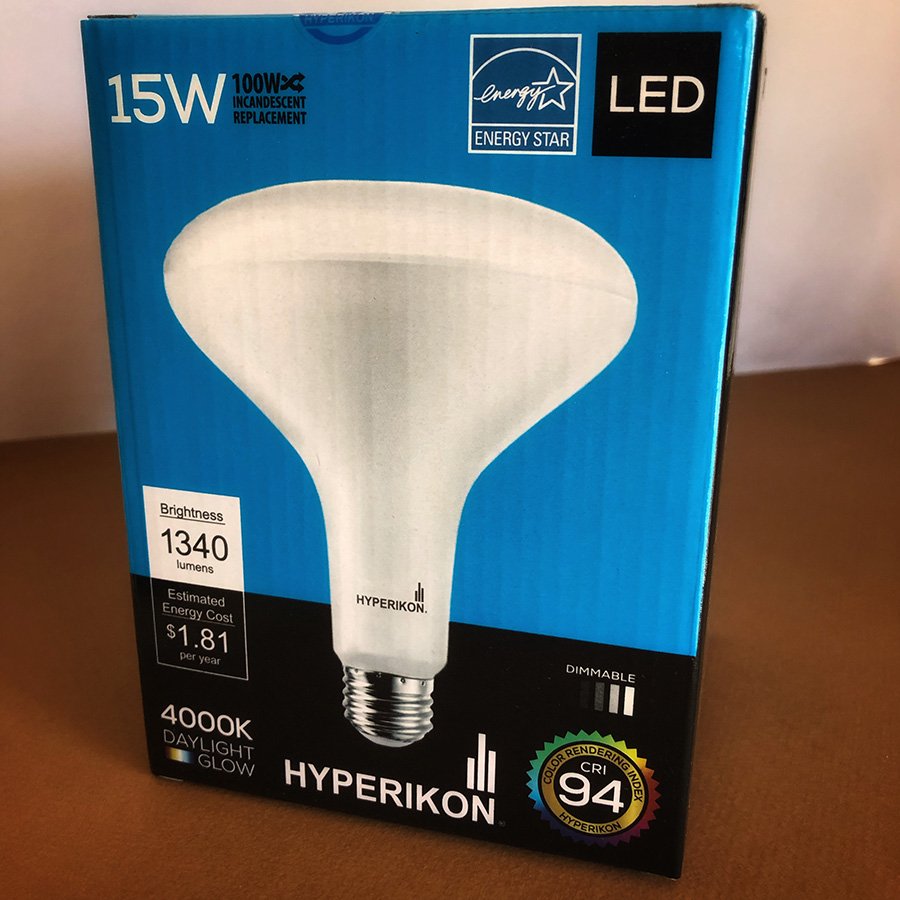
Temperature: 4000k
I personally find that I can get a more accurate image with my Nikon dslr camera with 4000k bulbs, but 5000k bulbs are available as well.

CRI 94
CRI stands for Color Rendering Index, and the higher the number, the more accurate the light source in rendering color.
Tips for novices to capture your best images using a light box:
Shoot in RAW, this will give you the most flexibility in editing your image
Make sure there is not a light source, such as a window behind you, this can produce a glare or shadow in the box
Still seeing a glare on your painting, shift your lights around, changing the angle they shine into the box, 45 degree angle works well.
Yes, you can use a polarizing filter. I have one, and I do use it for larger paintings if needed, but I find with smaller works, it is not as effective, at least for me and tends to shift the temperature towards yellow.
This Lightbox solution eliminates glare (or greatly reduces it) for artists who use gloss varnish, like myself.
Don't have Photoshop?
I know there's several inexpensive and free photo editing options out there, do some searches.
BUT, if you want to go super basic.. send the photo to your phone and use the app Snapseed!
I use this app every day in editing photos for my social media feeds. I use my DSLR to photo my paintings for high res images, but for snaps on the go, I use my phone, then edit the images in Snapseed. It has tools for adjusting temperature, contrast, brightness, plus a lot more., There’s even an easy tool for straightening and adjusting the perspective of your painting if it is not square.
If you are looking for a more indepth photoshop tutorial to geek out on, go search the webs, there are several artist's that have made some really in-depth posts. This is for those seeking simple and cost effective!!
Happy painting!
Christine
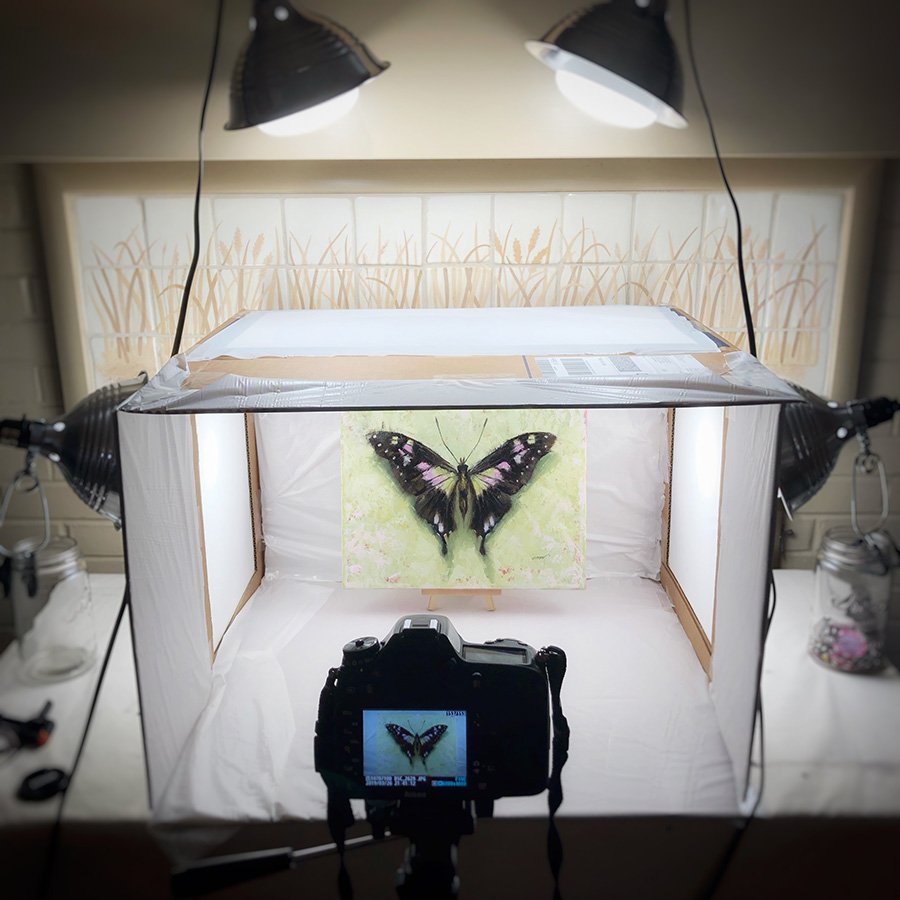
My homemade photography Lightbox. Made from items I had lying around in the studio… old cardboard box and thin white translucent plastic sheeting. This painting is 11×14 inches!